
In my thirty plus years as a sculptor, I have worked on many interesting and varied sculptures for clients all over the World. Most recently I completed just such a project and this is the story.
In October 2016 I got a phone call right out of the blue whilst I was competing at a horse show. It was an international number but a very English sounding gentleman spoke of a project he was working on, on behalf of the Environment Ministry of Abu Dhabi. This was my first introduction to a project that would take over my entire working life for 15 months.
There was an urgency to this contract so, six weeks or so later, we had the contracts signed and knowing how tight this schedule was, I was eager to make a start. The Environment Agency, or EAD required five life size sculptures of different species that they worked with as part of their conservation work. These were the Arabian Oryx, Dugong, Greater Flamingo, Hawksbill Turtle and Saker Falcon. I confess I didn’t have an in-depth knowledge of any of these, but as with all such projects, part of the attraction is exploring and learning about the natural world I am passionate about. Having said that I am very comfortable and experienced with all aspects of the animal kingdom, so I wasn’t daunted by any, just excited for the journey of exploration I was about to begin.
The schedule required for this project was pretty crazy, but not unusual. Clients always underestimate the amount of time required to produce a sculpture. Anything from a couple of weeks to several months in the studio, depending on the size, complexity and content of the required finished sculpture, is the norm. Then 1-2 weeks to be moulded and a further 6-12 weeks at the foundry being cast, again depending on size and design. Working back from their required dead-line, I thought I could do it, even though Christmas was obviously to be written out of the calendar for that particular year! It was going to be a very intense few months.
After over thirty years in the business I have a tried and trusted way I always work.
If the sculpture is to be life sized I always produce a maquette first. This is best described as a three dimensional ‘sketch’ and it serves several purposes.
The first and obvious one is to ‘design’ a sculpture which will work when viewed from all angles. People often supply me with a favourite photo and want a sculpture made from this. This would be OK if it is to be a two dimensional drawing or painting but, they always forget that a sculpture has to be viewed from 360 degrees, both vertically and horizontally. This is where an ability to ‘copy’ is not enough to be a good sculptor, you must have an extensive knowledge of anatomy and a feel for the balance, movement and ‘life force’ of the subject. I spend so much time trying to bring this to my sculptures, and during that process they will be continually turned on a turntable to ensure that they are worked in the ‘round’, not just one view.
Secondly, the designs for this project, had to be approved by the scientists and experts who worked with each specific species for correctness of anatomy and character. Getting their input is very useful and ultimately reassuring that I am correct in my interpretation of the subject.
Finally, the armature (the frame onto which the clay sculpture is constructed and supported) for each large sculpture has to be designed and made. As this is a welded or at least, quite robust construction, and not easily adjusted. This structure has to be accurate and I design it and calculate measurements, by enlarging the dimensions of the small sculpture, after it is approved.
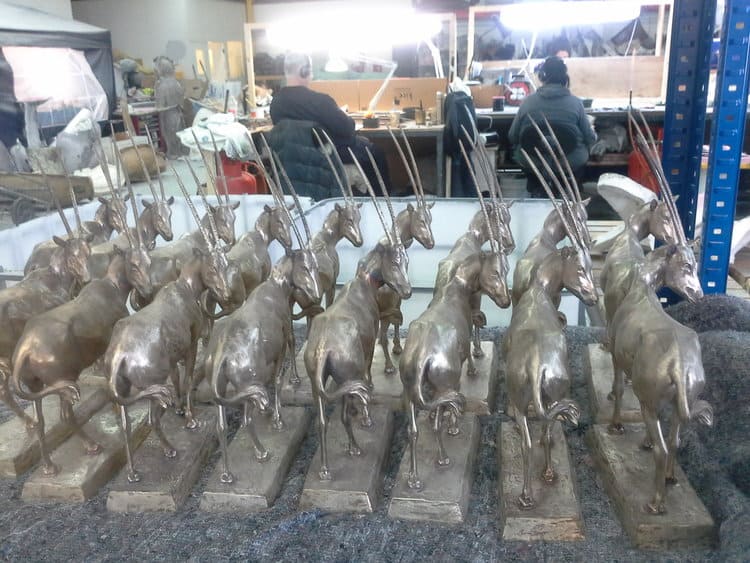
As multiple copies of the small maquette were also to be produced in bronze, I chose the Arabian Oryx as the first to be made.
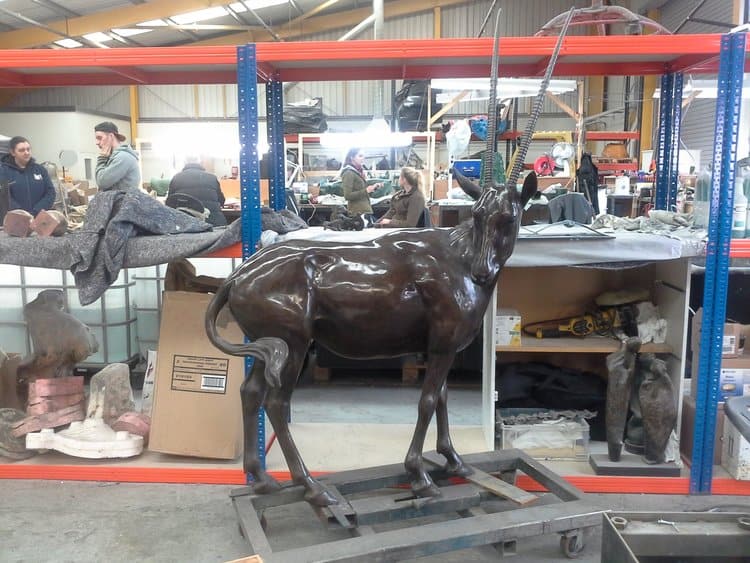
The Arabian Oryx
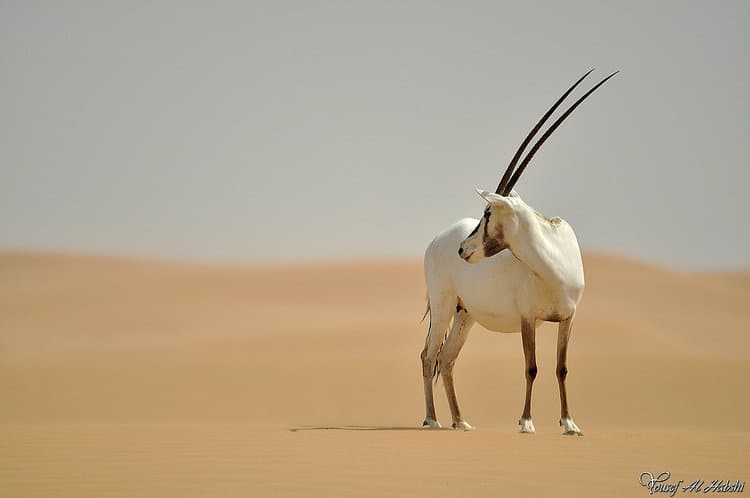
Getting as much reference as possible together was the next job. Fortunately there is a small breeding herd at Marwell Zoo and as the EAD work closely with Marwell on conservation projects, I was able to get a ‘back stage’ pass to go and see the Oryx. This is one of my favourite parts of my job. Getting to go where ‘Joe public’ doesn’t. Speaking with the keepers and getting special access, all makes my days so enjoyable and gives me an insight to the real animal. So a day was spent photographing and watching these small, lovely Oryx. I was also able to scour their paddock whilst they were shut in, to find a footprint and in best ‘CSI style’ I was able to take a plaster cast of a partial print, which was later required to make a rather novel corporate gift.
Next is the choice of pose for the sculpture. This is an important decision and several factors are taken into consideration.
Firstly artistic. I hate a wooden, expressionless, static sculpture. When I see these I think it’s a lazy, easy way out for the artist and cheats the client and viewing public. An animal is alive and should look that way. Even if the sculpture is to depict a standing animal, it should look like it’s about to take a step, has balance and has ‘soul’. (This is my mantra and pet peeve).
Secondly, practical and technical considerations. This was to be a public sculpture and the ‘public’ can do some pretty stupid things, so strength has to be considered. Oryx have very fine legs and Although bronze especially silicon bronze which I would be using, is strong, I try and allow for the crazy human race, so I wanted at least three legs on the ground, preferably four.
I always had a pose in mind and this was confirmed to me whilst watching them at Marwell. An alert male, head turned and ready to react to the surroundings. This gave me the strength of four legs on the ground and the movement I wanted.
Now, armed with multiple print outs of my photography at Marwell I was good to go and the studio work on the maquette commenced. As I knew that the maquette would ultimately be made into a finished sculpture, I chose to make it an appropriate size and one which the various measurements could be easily be multiplied for the large scale piece.
The maquette was made in a material similar to plasticine. This doesn’t dry out and is fairly portable, important in this case. It’s also a material that I am very familiar with and the way it behaves is a big part of the style of my work. Making animal sculptures particularly mammals, is my bread and butter and the movement, balance and general anatomy is just ‘what I do’ and have done for many years. The only slightly different thing about the Oryx was the horns which had to be maybe out of a material that hardens, as they would otherwise be too vulnerable.

The Arabian Oryx maquette in plasticine.
Once made to my satisfaction, I then had to get approval from the scientists who are working in the field with the animal. Sculpture is very hard to photograph. The shadows have to be enough to show the intricacies of the modelling; too much light wipes out all the three dimensional aspects and it is best photographed from a way back with a zoom lens to avoid for- shortening. When showing a piece to the client for the first time (especially experts in their field) it’s not possible to make excuses for the short comings of a photograph. You only have one chance at a first impression!
As I remember, the only hold up I had during this project was occasionally waiting for the feedback. It can be nerve racking; was no news good news or did they not like my interpretation, or, as was always the case, are they just busy and not understanding of the urgency with which I was trying to complete this project!
The first maquette of the first subject was approved and the green light for the large sculpture to commence. Making large scale pieces is enjoyable but very different to a small piece. A small scale sculpture is worked on a turntable with me sitting down most of the time. In the winter I’ll be in front of a heater usually some of the material on top of the heater keeping soft for me to use. I will also make a rare confession here! There is almost always either a TV or radio on. I find sitting and concentrating on a subject eight hours a day, too intense, and I welcome distractions. Radio two, re-runs of Time Team and the occasional old black and white movie are often running in the back ground, along with the frequent visit from one of my cats, a dog, even occasionally a chicken! I’m sure every artist alive has their own way of working. I have heard writers describe how they lock themselves away, forcing themselves to write and find the whole thing quite a painful experience. This is not for me, I look forward to my time in the studio and when I’ve had enough for the day, I know I am no longer making any progress and go do something else. Ride a horse, walk the dogs or meet someone for a coffee. I learnt a long time ago that to continue is counter- productive and only results in going backwards creatively. When I am working to a tight deadline or particularly enjoying making something I will often go into the studio for a couple of hours in the evening or at the week end, having had a break. For me, working in 2, 3 or 4 hour stretches with something else in between, works best. There is always office work, research or e mails to do. Another advantage to having breaks is that a fresh look will inevitably point up something which could be improved or something which would be better if changed.
This is my comfortable way of working a small sculpture.
Large sculptures start life as a small one as already described. However, once the design is made then it becomes for a while at least, an engineering project. Experience will tell me how much weight of clay will have to be supported, where the best place for the supports are and therefore, what sort of armature will be needed. (The armature is the support structure onto which the sculpture will be built, some will be inside the sculpture and some on the outside). Then depending on the design, I will have something welded to my design and specifications or I will make it from wood and armature wire. I will built this onto an appropriate sized heavy, plywood base, on a trolley with heavy duty casters. My Father is an engineer and although I am entirely self- taught as an artist, I think my practical mind and wood and metal working skills have come down through him.
The metal or wood of the armature is merely the strength of the build, usually there has to be some ‘bulking out’, before the addition of the clay. This can be in the form of chicken wire, plaster, or foam, but the purpose is just the bulk out the areas such as the body where, otherwise a huge amount of clay would be needed. I generally use foam and this takes several days of adding and carving back, the foam taking several hours to go off, so I generally try and add material last thing in the evening, so it can go of overnight. Once it has been done to my satisfaction, the fun bit begins…. adding the clay.
I use ordinary air drying clay for my large scale work. Plasticine would take forever as it is added a little at a time, and keeping it soft is very difficult. Clay has the opposite problem of having to be kept from drying out, but it can initially be added much more quickly and therefor has a much quicker sense of taking shape. On hot days you can be limited on the time you can leave it uncovered, having to continually spray it with water, and wrapping it with soaked cloth and plastic sheets, to re-hydrate the clay and make it pliable again. The thinner bits such as ears and lower legs dry out quicker than the body so I often avoid making these areas at first, and then can keep them wrapped whilst working on other areas. A large piece such as a life sized horse, becomes something of a juggling act and a race against time. These are all little things that are sent make the life of an artist more complicated and something which the clients never understand!
The sculpture can never be allowed to totally dry out. Clay shrinks when it dries, so as it is built on a frame or armature, it would completely crack if allowed to dry out. At best, this would result in a crazy paving pattern of deep cracks and at worse, large pieces falling off. This method of building a sculpture on an armature, is solely for the purpose of producing a mould, it is never meant to be a finished sculpture in its own right. Once the mould is made the original dries and basically falls apart, with the material thrown away.
A large sculpture is physically hard work. I am on my feet, constantly walking around or turning the heavy sculpture. I’m often up and down stepladders or scaffolding, to reach the high bits and on my knees to get to the lower bits. As well as that the clay is heavy and has to be worked forcefully to adhere and then be smoothed out. Sculptor’s hands are pretty strong and there’s no room for manicured nails or delicately soft skin. If there’s a jar lid that nobody can open, I’m usually the one to do it!
The large Oryx took maybe 5 weeks to complete working in the studio during the day. As became the pattern during this project, the evenings were spent gathering reference and making a maquette for the next planned large sculpture so that as one was completed and moulded ready to be cast, the next one was ready to be started. This was necessary because of the deadline. Again the sculpture was photographed and sent off to be scrutinised by the experts, whilst I thought about how best to mould it and move it to the next stage.
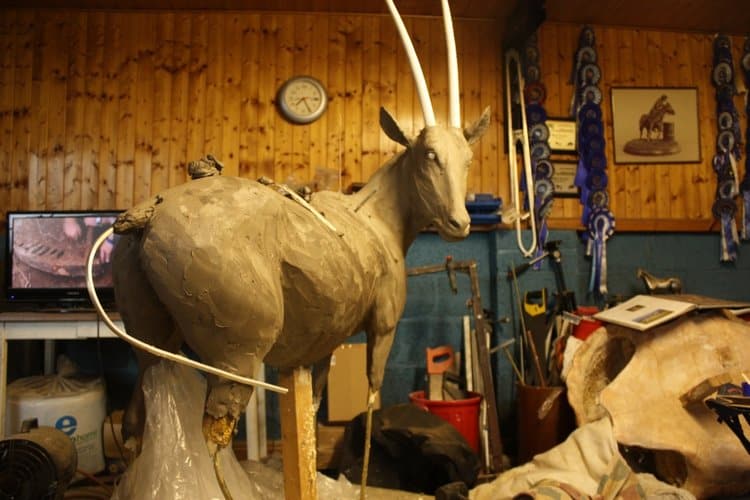
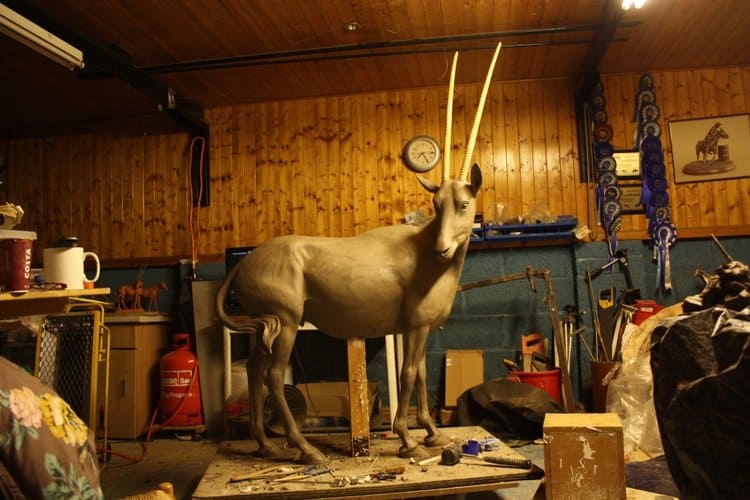
The large Oryx during the sculpting process, showing some of the armature exposed
Small scale sculptures can be easily transported the 90 odd miles to my moulder. The larger ones take more organising depending on the size and design. This is where a robust armature comes into its own and with something of the size of this small Oryx I can just about manoeuvre it onto a tail lift of a rental van and lift it in. Ideally sliding it off the wheeled trolley, otherwise just anchoring it to prevent movement during transit, becomes a complicated task. I am used to driving carefully having driven thousands of miles travelling another valuable cargo, in the shape of my Horses (the real ones!). Even so the motion of movement invariably damages the still wet clay sculpture so at the end of my journey I have to don my sculptor hat again and go back to work, fixing the damage. The transport of these sculptures is never ideal, but the alternative is to have two guys in hotels or travelling 4 hours a day for a week or so and not only adds to the cost but also is not the best use of time for either myself or my moulders. With anything larger there is no alternative but to mould it on site. This would be the case with the Dugong and Calf but that is for later in the story.
Dugong and Calf
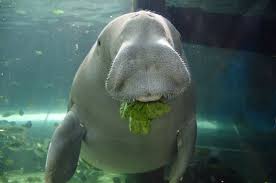
With the Oryx now being worked on for the next stage in the process, they was no time for a break, I needed to be working on the next piece in the studio. I opted to make the largest sized sculpture, the Dugong and Calf, in order to give the foundry as much time as possible to complete it. This piece was to be over eight feet long with a calf of five feet. This time there was nowhere to go and see a live specimen. Not easy to keep in captivity, the only one I could locate was in Australia.
I had an invitation from the EAD to go and see them in their breeding grounds off the coast of the UAE. However after much consideration I decided that the time constraints were such that there just wasn’t time and I didn’t deem it necessary. At best we would have flown over the breeding grounds, but never close enough to disturb them.
Years ago there would have been no choice, but now there is better material available. To be honest I have spent many a day waiting for a glimpse of an animal, only to see a brief flash of fur and nothing else. David Attenborough and his ilk have spent months staking out the most amazing creatures to get better footage than I could in a lifetime. It’s not enough on its own but add it to my knowledge and understanding of the animal kingdom and it gives me certain advantages over my predecessors and I’m grateful. I feel sure that the great masters of the past would have used all at their disposal in order to learn about their subjects.
I was able to find great footage and to spend a lot of time watching these lovely, gentle creatures slowly swimming and grazing on the sea bed. I eventually choose a pose which showed their slow graceful movement, whilst also demonstrating the relationship of a mother that nurtures its young. The other consideration was a pose that could be interpreted as being in water, but also have enough contact with the ground to support what would be a very heavy sculpture.
The adult was made first as a separate, standalone sculpture, then the baby was also made separately. The relationship, one to the other was worked out at the maquette stage, and then once again had to be approved by the scientists in Abu Dhabi. The relationship of mother and calf had to be maintained in the larger sculpture, the difficulty being that once I started work on the large sculpture, it was not manoeuvrable so was never really was put together until it was craned into position once in bronze.
This large 8 foot sculpture took up a lot of space in my studio and once the mother was finished I set about making the calf.
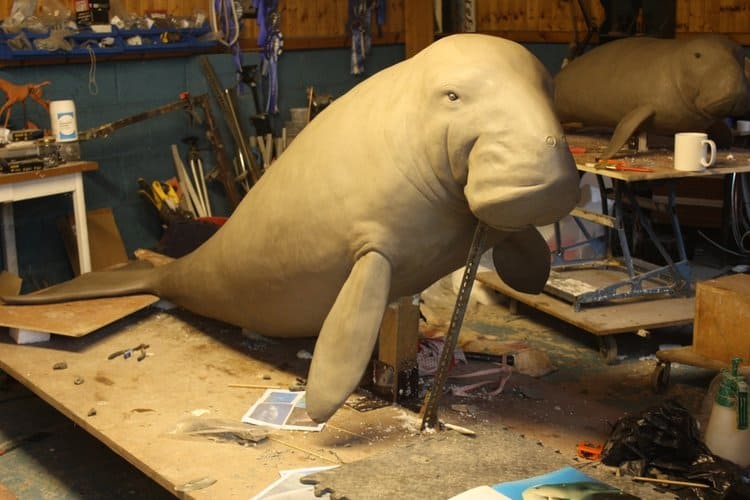
The Adult Dugong in Clay. The calf can be seen in the background.
These took a few weeks of working and then as described previously, my moulders, Neil and Ricky, travelled up and spent a week making the moulds. Moulded in sections, once finished the moulds are easily transported to the foundry to start the casting process.
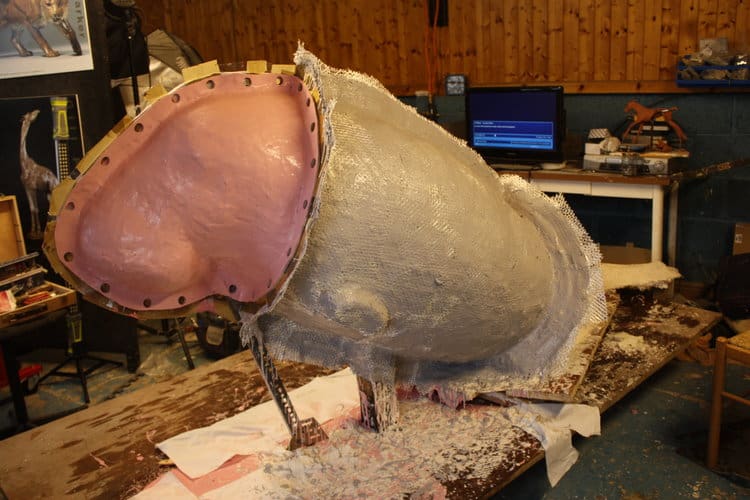
This shows one side of the moulding process of the adult Dugong. The Clay sculpture is ‘inside’ this. The head section shows the rubber which coats the clay sculpture and will pick up the detail. The rear section shows the addition of a hard case, which supports the rubber.
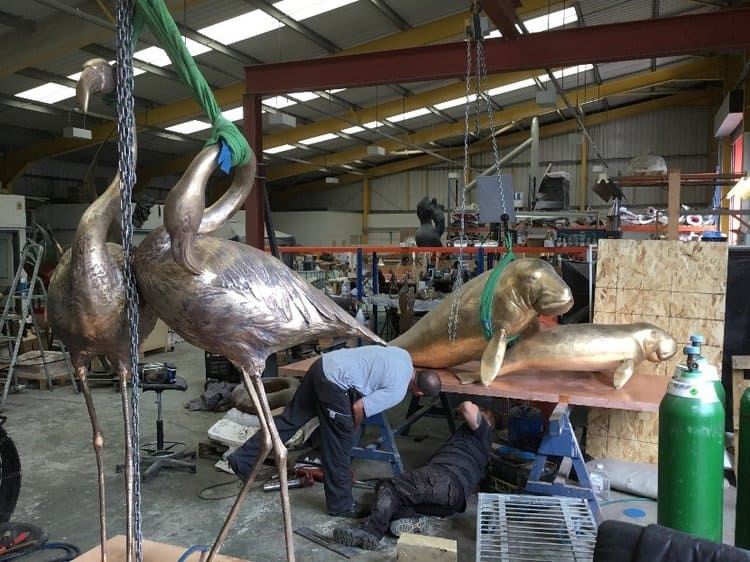
It wasn’t until some weeks later, when they were finally in bronze, that I was able to put the two parts of this sculpture together. Once in slings and supported by the crane they were easily manoeuvrable and with the help of some of the guys I was able to move them easily and try a few variations.
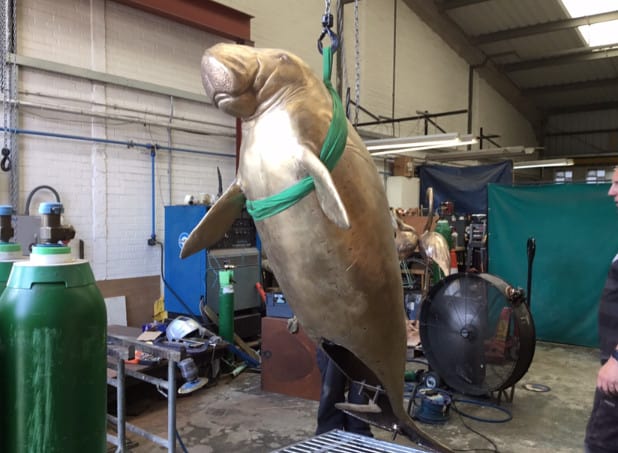
Adult Dugong on the crane.
The final positioning of the two, was slightly different to the one I had originally planned for, but seeing it in the large scale there was a different eye line and I changed the angles slightly to take advantage of this. I try not to be ‘precious’ about what I do and I hope I am never too proud to change something if the piece can gain from it. The final result was exactly what I hoped for and all concerned, including the experts were very happy.
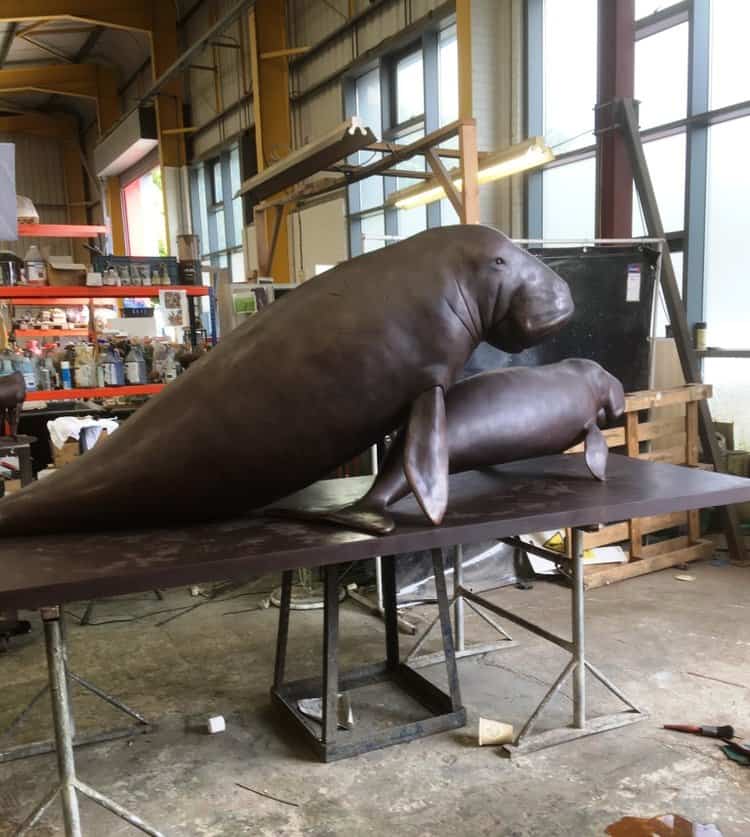
The Dugong adult and calf putt together on the base and patinated, prior to polishing.
*************************
At this stage I should explain a little about the casting process, as whilst working on one sculpture in the studio, I was continually travelling to my founders in Basingstoke to work on and supervise the previous sculptures at various stages of their production.
I have already spoken of the mould and this is made of rubber with a ‘case’ of plaster to keep the soft rubber in shape. Each part of mould is usually in two pieces which fit together to leave a cavity that is a ‘negative’ of the relevant part of the sculpture. This is swilled with molten wax, so that a hollow copy is made. Once hard and removed from the mould, I am able to work on the surface at this stage, if necessary.
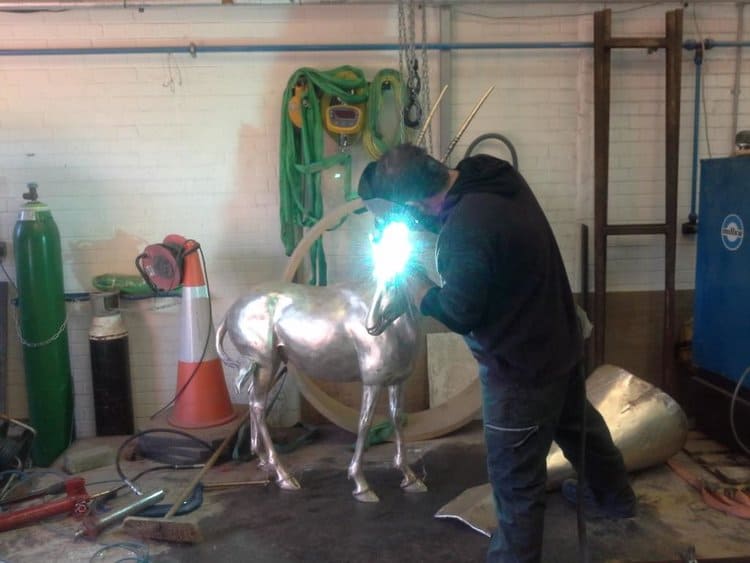
The checked wax pieces will now become part of a waste mould. A ceramic material built up in layers will cover the wax and, once baked, the wax runs out and leave the cavity for the molten bronze to be poured into, this is the famous ‘lost wax process’ which most people have heard of. When the bronze is cool the various parts, now in metal, can be broken out of their mould and turned over to the ‘chasers’. It is the chaser’s job to weld together the pieces and to restore the sculpture which is now metal, to be an exact replication of the clay that left my studio. Once finished to my approval, it can be patinated (coloured) to my specifications.
This is a very basic description of a very technical and skilled process, but does illustrate the various processes my sculpture still has to go through before it is a finished piece ready for show. I am at the foundry on average one day a week, either looking at waxes, metal work or colouring. Whilst I rarely have more than one project at one time in the studio, I may be working on several different sculptures at different stages in the foundry at any one time.
A summary of the various stages of creating a sculpture in bronze are:
· Sculpting…..my time spent in the studio creating a sculpture
· Moulding…….the process of producing a ‘negative ‘impression of the original sculpture. This is a rubber mould backed with a plaster or fibreglass ‘jacket’ for rigidity.
· Sculptures can be reproduced using this mould but for each copy in bronze, the following is necessary:
· Wax…….…a wax copy of the original is produced from the mould. Each wax requires several hours of work by a wax worker and then by myself
· Running up and dipping………….the wax has runners and risers added to enable the molten bronze to flow to all parts. Over several days, the wax is dipped in a running ceramic material, allowed to dry then re-
· Dipped. This is repeated over several days until a thick coat of ceramic covers the wax. This is the waste mould.
· Burning out….. The waste mould is heated to allow the wax to run out and prepare the mould at the right temperature for casting.
· Casting………..…the process of pouring molten bronze into the prepared mould
· Fettling ……….. once cool the waste mould is broken away to reveal the sculpture and the runners and risers are removed
· Chasing………… this is where the skilled chasers (metal workers) put the parts together and work the surface of the bronze to the detail of the original sculpture
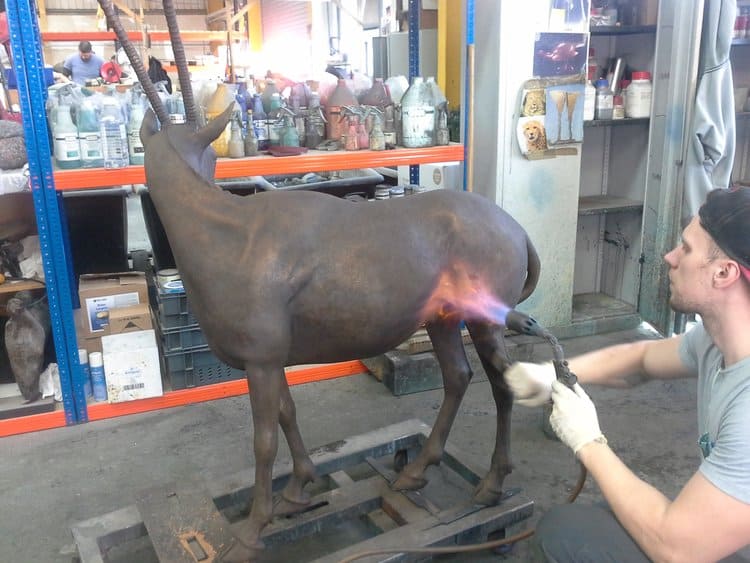
· Patination….…. The process by which the bright, gold coloured bronze is coloured using heat and chemicals
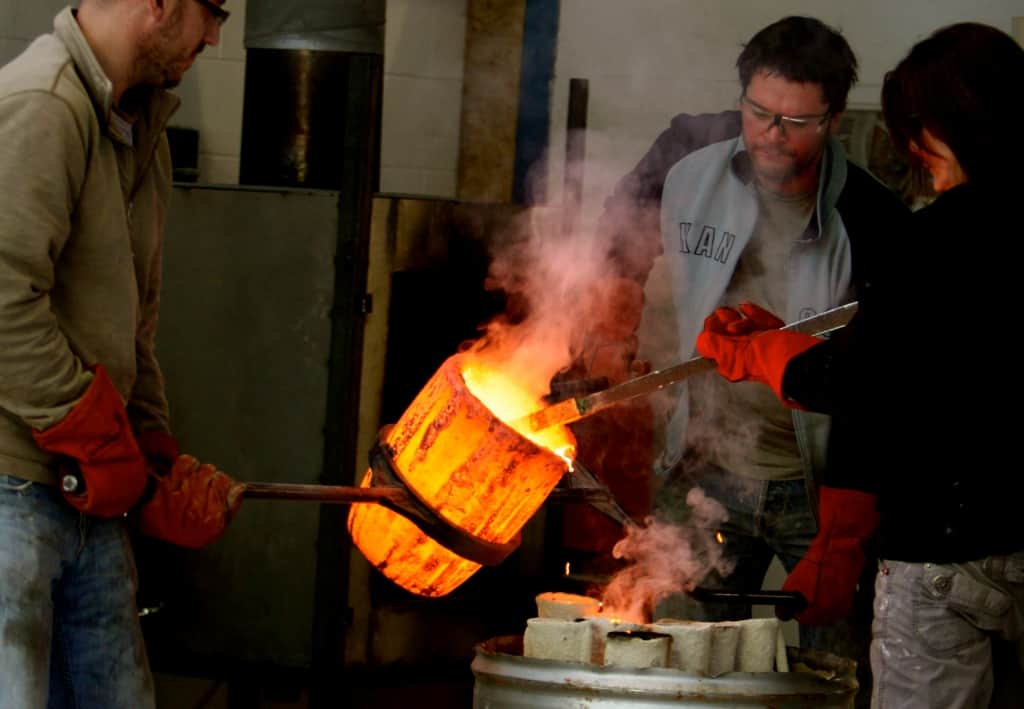
Preparing for the molten metal to be poured into the moulds during the casting process
This is a very simplified description of a very complex process! Once it leaves my studio, the moulding and casting process takes 8-16 weeks depending on the size.
**************************************************************************
Back to the EAD project:
Hawksbill Turtle.
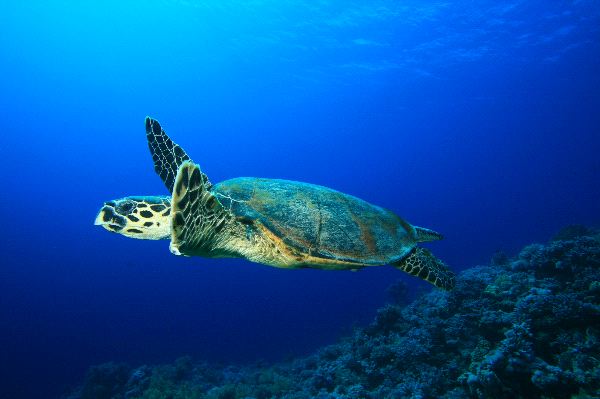
During my research, I learned the tragic story of their decline in numbers, as always, mostly at the hands of the human race. I heard that the Master Cutlers in Sheffield that had some specimen carapace (the shell) on their wall, so I asked to go and look. People are usually very obliging when you tell them what you are doing and I was able to photograph some specimens that had adorned the walls for hundreds of years. Unfortunately this was as a result of being caught in their thousands to make tortoise shell handles for the cutlery industry, and some being the big delicacy for grand banquets as turtle shell soup! It was good that I was able to redress this slightly with the intention of recording them as the beautiful creatures they are, all made possible as a result of a much needed conservation project. As always, Humans trying to redress the damage and often catastrophic mess, made by other Humans.
Again, non in captivity that I could find, something I welcome from an animal welfare and conservation point of view. However I was once again able to find brilliant footage. As a non -swimmer with an irrational fear of water, these subjects would be out of bounds to me, so I am eternally grateful for the internet and my hero David Attenborough and whatever it is within me that allows me to have the feel and interpretation to recreate these amazing creatures. Scientists in Abu Dhabi were able to supply me with scientific data, measurements etc. so I was good to go.
I first made the underside of the carapace or ‘shell’ on an armature which was at this stage still unattached to the base, as this would be difficult to get to once attached to the base. Then it had to be turned over and attached at the right angle and height to add the legs to the design I had made. This is the advantage of making a small maquette first. The carapace alone was the size of a medium sized coffee table. It was ‘bulked out’ with foam but even so, the weight, once it had clay added all over it, was far too much for me to manoeuvre or adjust so the transfer of measurements from the maquette were vital to be able to make a robust and accurate armature.
This was a fun one to make with the contrast between the texture of the carapace, the armour like scales of the legs and head, and the soft wrinkles of the neck and areas where the legs disappeared into the carapace.
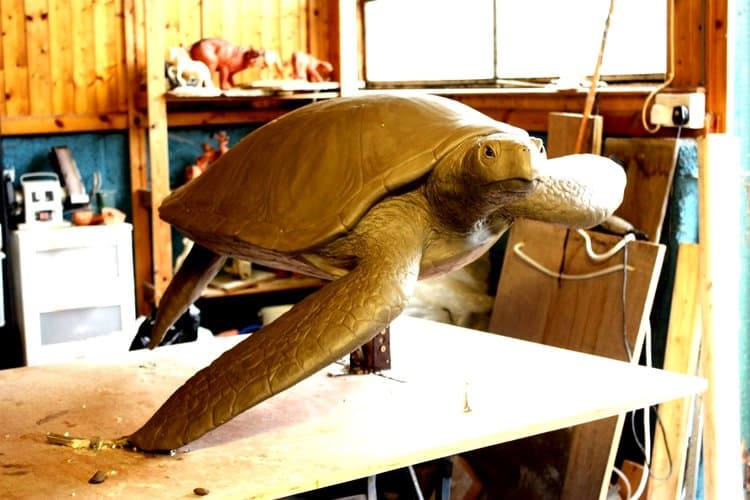
The Hawksbill Turtle, being worked on in the studio
I had experience of, something similar, having made a pair of Galapagos Tortoises a few years ago. It was difficult at times because I wasn’t able to see underneath, in parts it was only inches off the base. I had to work by feel but also knowing that some things would have to be worked on at a later stage in the process. (This was something I was able to do in the wax.) A fairly normal dilemma in the day of the average sculptor!! Again, this one had to be swimming and I had it touching the floor with one flipper but had to create a fairly unnoticeable support in the design of a piece of coral. I don’t like making contrived supports but sometimes there is no choice, and I think I got away with it in this case.
I was delighted with the result.
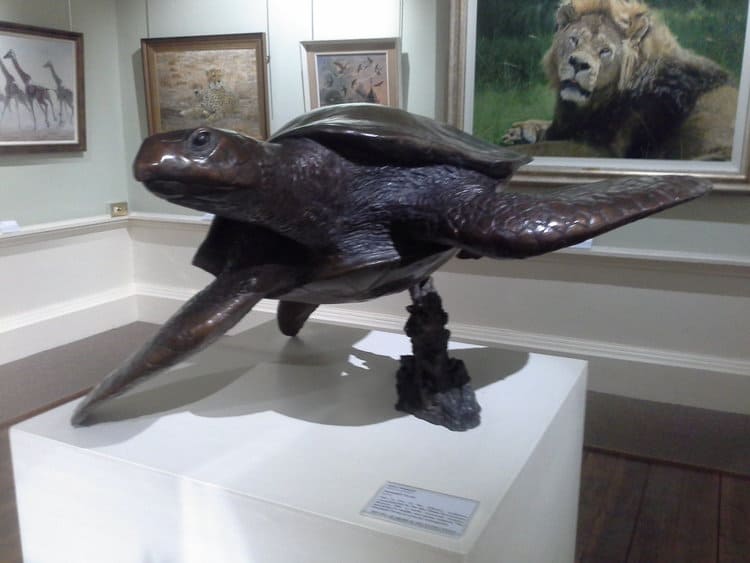
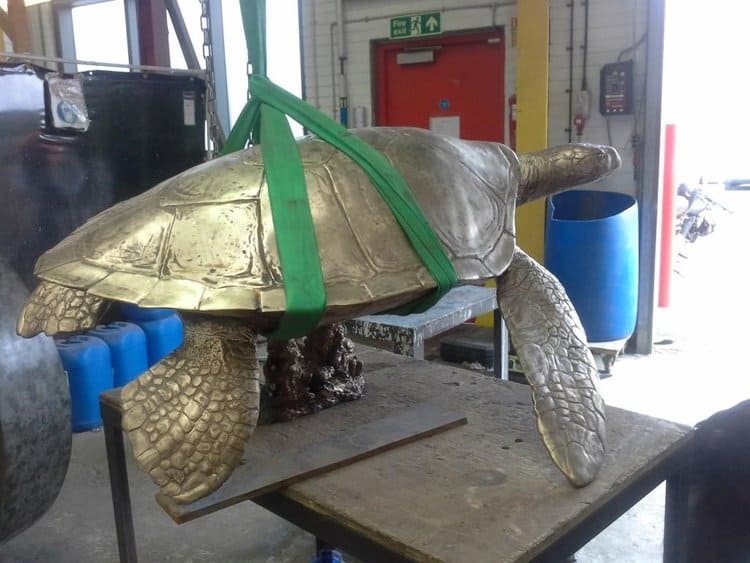
The Hawksbill Turtle in bronze
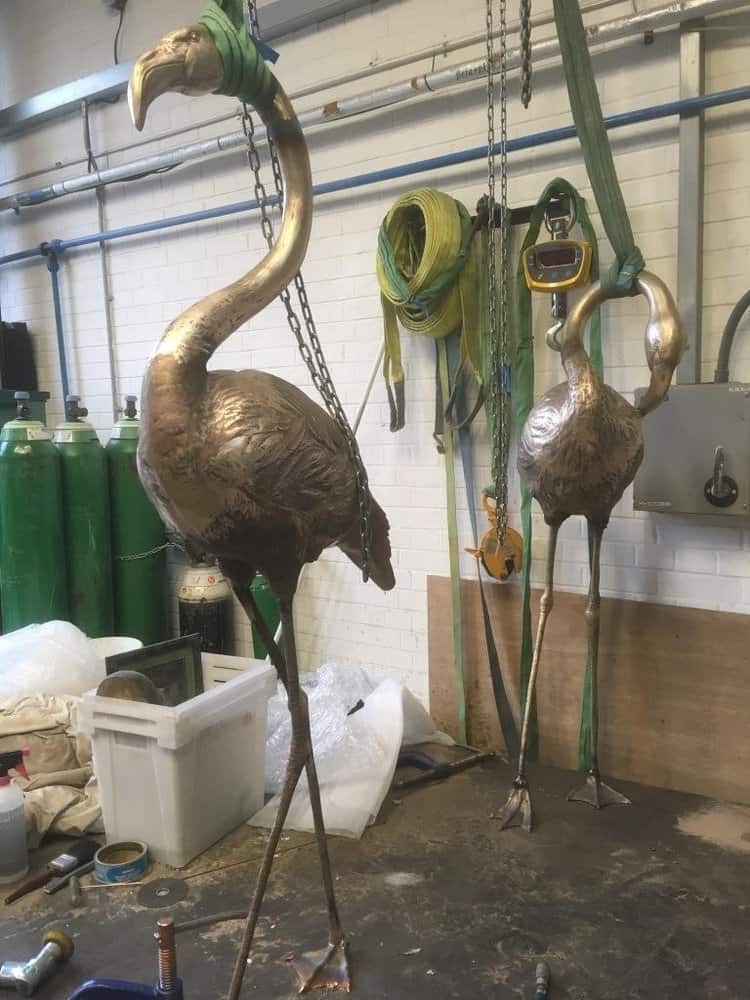
Pair of Greater Flamingos
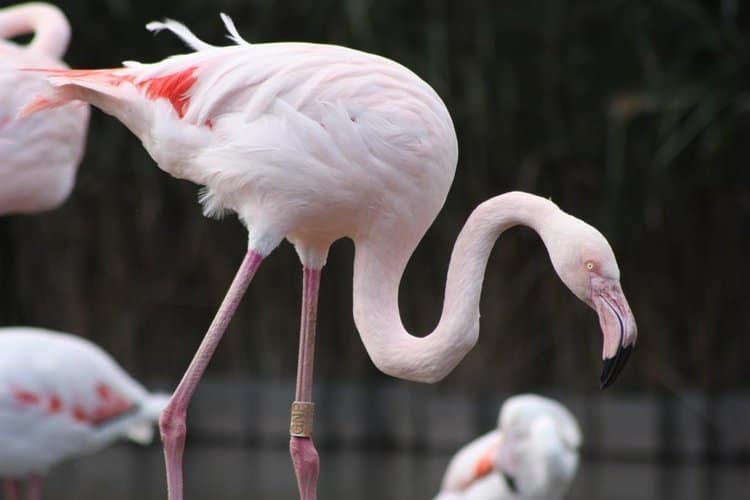
The Flamingos were next. The legs on a sculpture of this type of bird were a concern to me. They were for public show and they were not strong or stable enough in my opinion, to withstand the abuse that people put upon sculptures. For this reason, I asked to be able to make a pair, as my idea was to have them slightly touching therefore having the strength of four legs instead of two. This was given the go ahead and I think worked out to make a very pleasing sculpture. Birds are a bit of a dilemma for me. Feathers are a difficult detail to portray. Some artists get round this by simplifying the surface completely, some try and portray each feather, but with varying degrees of success , in my opinion. In order to fly, a birds feathers have to be pristine, so you could argue that very little detail would be visible except up close. A bird only fluffs up its feathers to keep warm or if it’s not healthy. I always try and go somewhere in the middle. It was important for this project that there was a decree of realism rather than stylisation, but every feather filament can look clumsy and contrived. My take on sculpture is that what you decide to leave out is as important as what you leave in. I hope I got it right, but the end result was just what I hoped for.
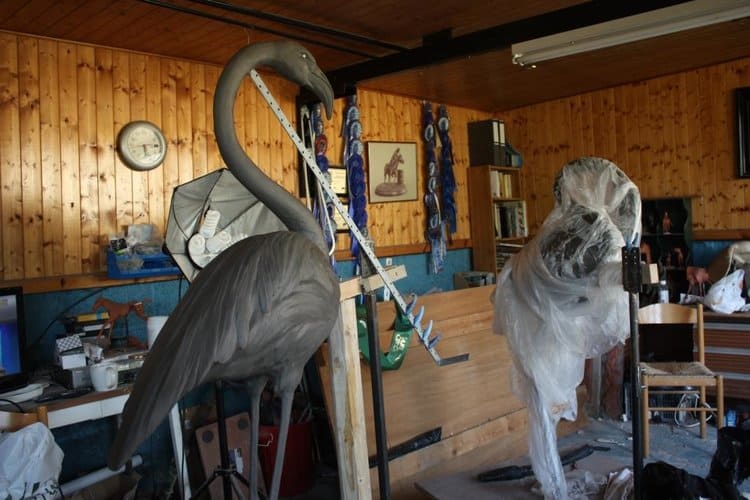
Flamingo in clay showing the external armature supporting the neck. The other of the pair is wrapped in plastic to keep it wet while I work on the other
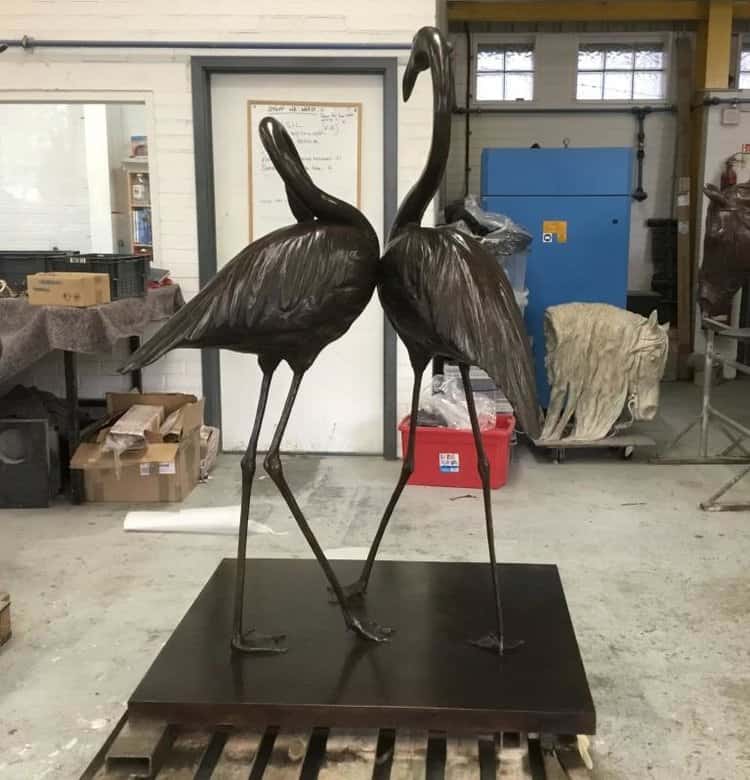
With a sculpture of a subject that has a very classic shape, I always consider the silhouette and this sculpture was a great example of this.
The Saker Falcon
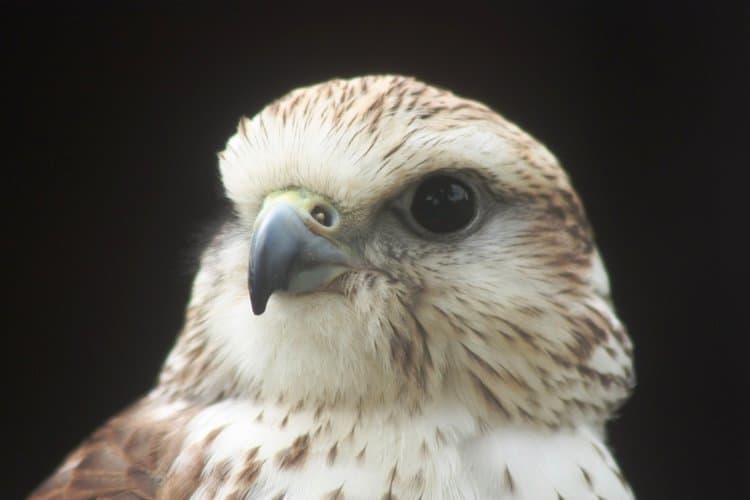
The final one to be tackled was a Saker Falcon. I had already had an idea to make a Saker for myself and had a rough design in mind. I knew there were birds at the International Centre for Birds of Prey, a world renowned centre for conservation and education. As a season ticket holder I often drop in to watch their brilliant flying displays, and they were extremely helpful in allowing me to study their Falcons. This sculpture was originally requested as larger than life size, as when you see it sitting it is quite a small bird and it was thought it would not be impressive enough, but by using a bird at the top end of the range of measurements, and to depict it with wings at full stretch, I did make it life size, with a little artistic license.
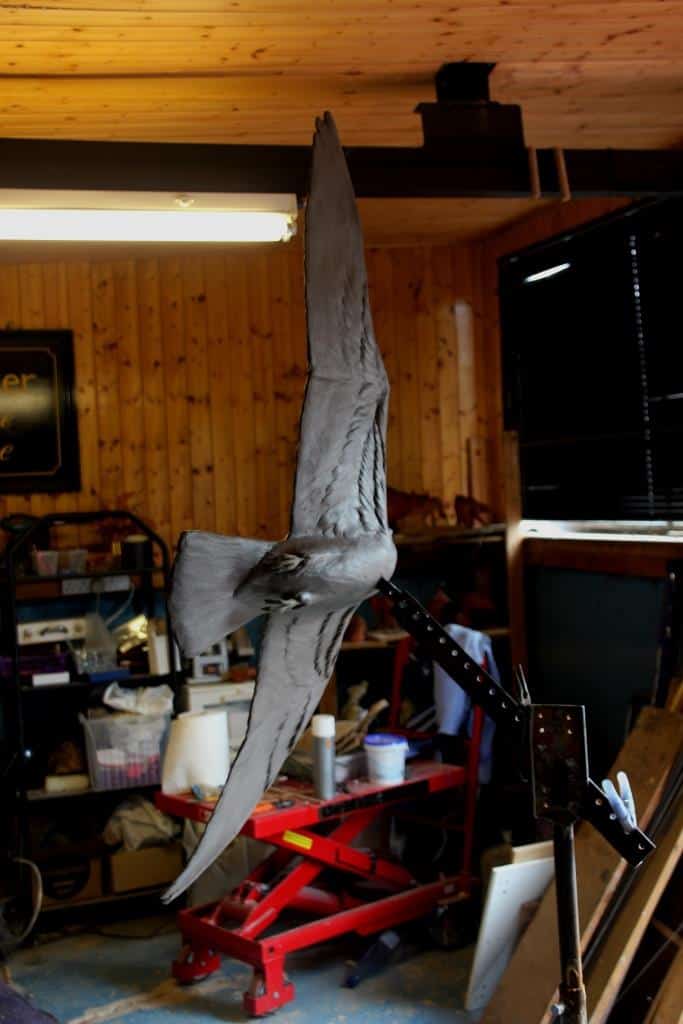
The Saker in the studio showing the armature.
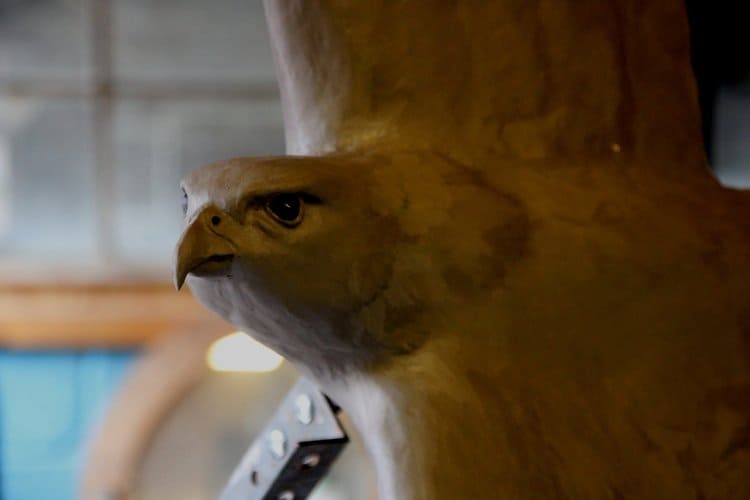
As it was in flight this was the only sculpture not to be free standing, it needed to be mounted and the only way in my opinion was to just be obvious about it and I think it really worked well. It was portrayed as if it was just ‘skimming past a post’ which meant that at around eye level it sits nicely alongside the other sculptures in the series.
********************************
With the completion of the sculptures in the Studio, the massive production operation was in full swing at the foundry and I was to be on the road a lot for the next few months.
The idea at the start of the project was to go out and permanently install them in the outside space where they were to be on show. As the project progressed plans changed and they were mounted on bases so that they could be temporarily put on show without a permanent fixing. The frantic deadline was never really needed but along the way I was able to be flexible and send certain elements such as the small Arabian Oryx, as they were needed. The large sculptures are now installed in the Umm Al Emarat Park in Abu Dhabi.
This was a great project to be involved with and for one of this size, comparatively straightforward. As a sculptor, this variety of subjects and scale of working is a treat to be offered and what I am always hoping for. Everybody involved were very easy to work with. There is invariably a lack of knowledge regarding the whole complex process of producing a sculpture in bronze, something which few people ever have cause to know about. This tends to be the main stumbling block when working with clients, just communicating what is and isn’t possible so that there is trust between artist and client. However for a project involving multiple small sculptures and 5 life size sculptures including two with two parts, all my studio time went very well. Over the course of the whole project I must have made over fifty foundry visits, racking up 5000 miles and there were times when everywhere I looked in the foundry, someone was working on parts of this project in various stages. It was an exciting and enjoyable time.
Gill Parker
With thanks to ;
Sculpture Castings Ltd, especially, Simon, Adam, Kev and Lee
Whites Moulding, Neil and Ricky
International Centre for Birds of Prey, Newent
Marwell Zoological Park
Gallery
